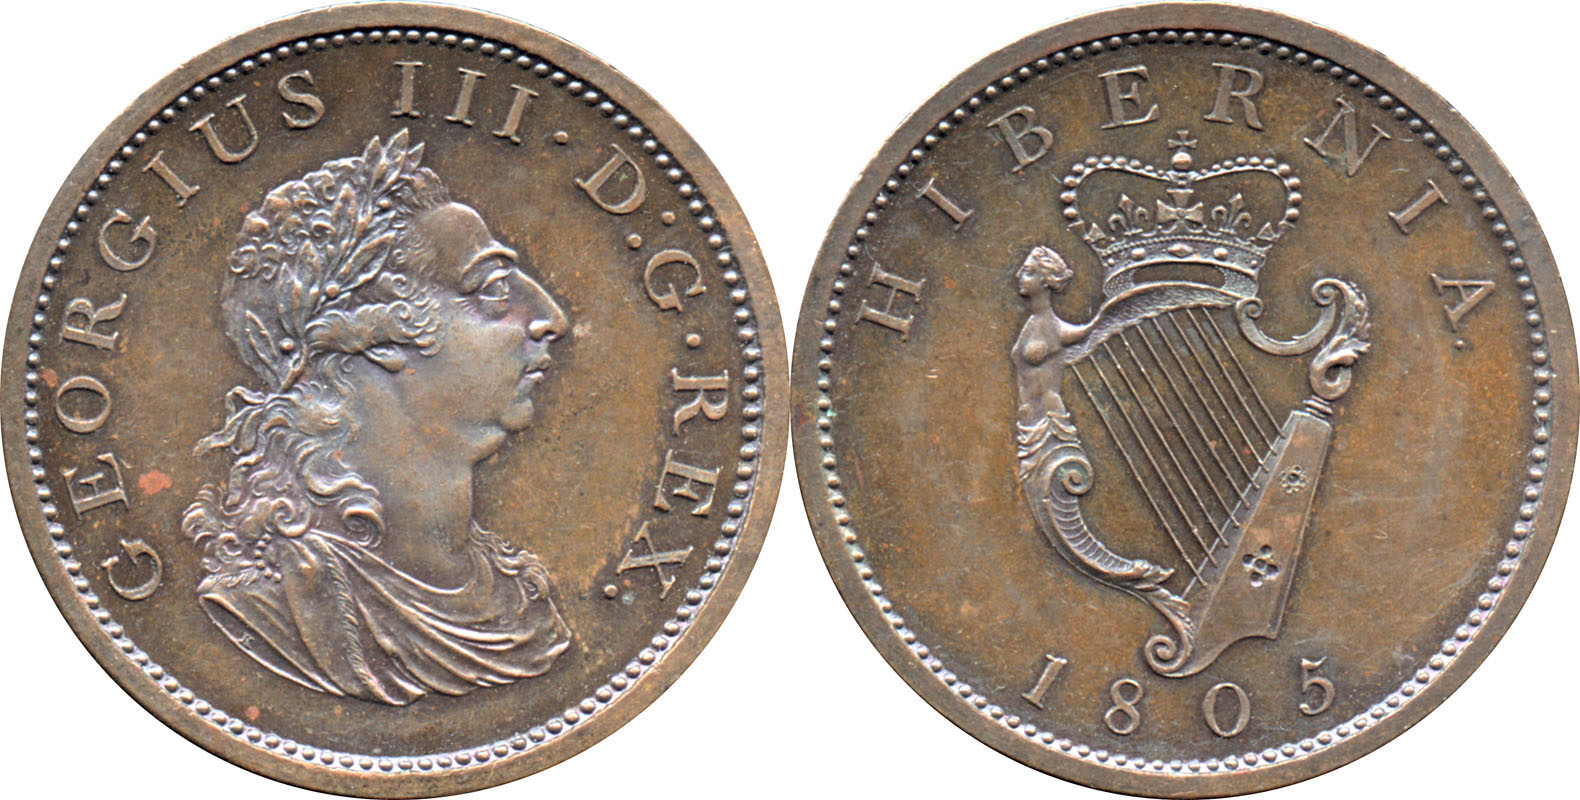
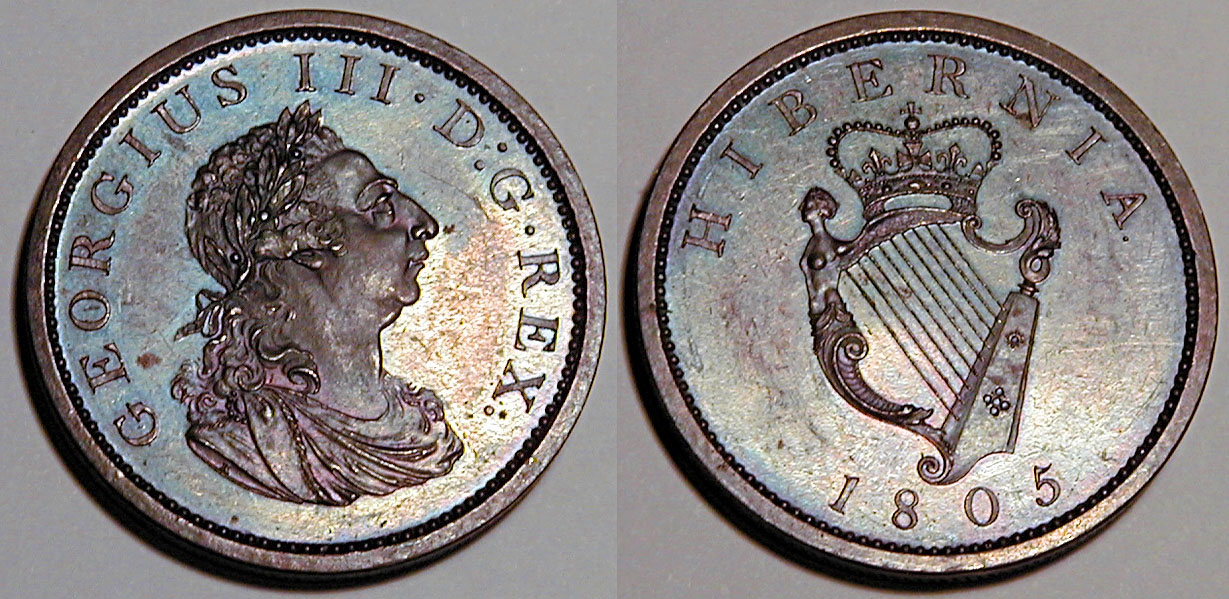
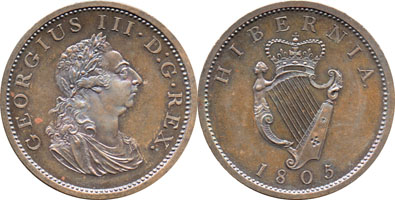
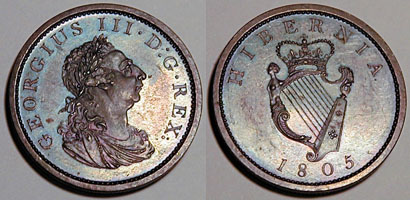
Imaging Coins: Scanner vs. Camera

Introduction

The two most common ways to image coins are by the use of a scanner or camera, and as will be shown here the same coin can appear significantly different based on which is used to image it. The scanned images on this page were obtained from a UMAX Astra 1220S with 600x1200dpi optical resolution, and the photographed images obtained from an Olympus D-400 Zoom digital camera, capable of an image resolution of 1280x960.

Reflectivity

The angle made by the light of a scanner to the item being scanned is relatively fixed, while objects and light sources photographed by cameras can be varied to best effect. This can be seen by images of an 1805 Irish penny graded Proof-64 by PCGS. The upper image captured by the scanner shows a high amount of detail, but the surface is a matte brown and no reflectivity is seen. The lower image is captured by the camera and the mirror quality of the surface is clear.
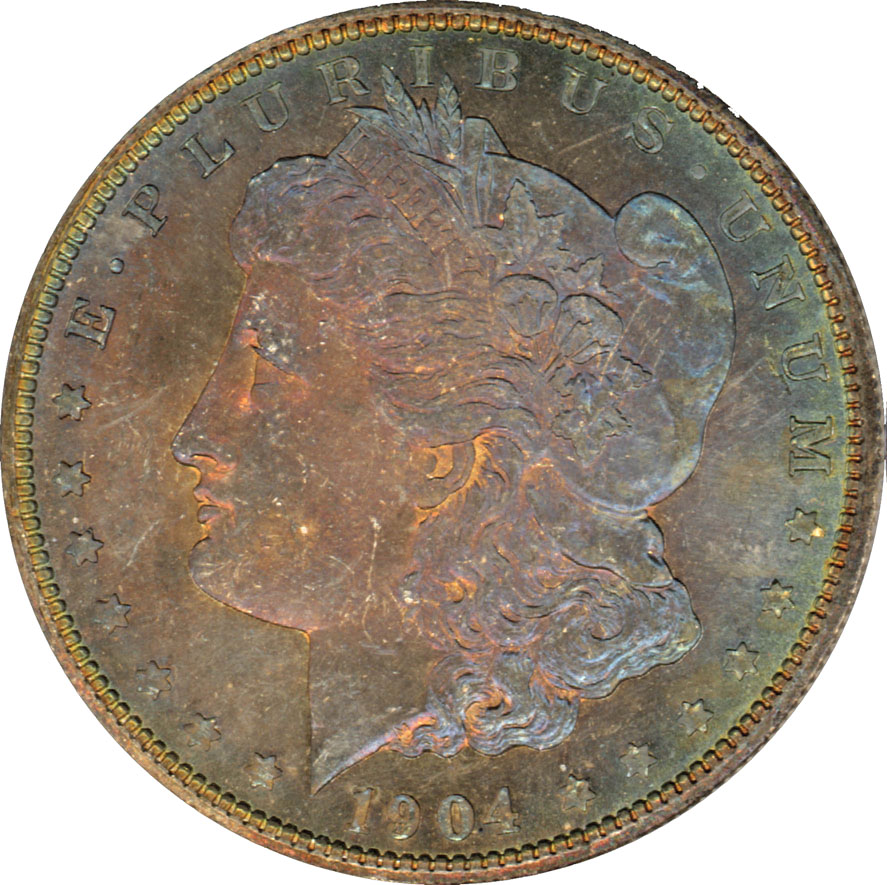
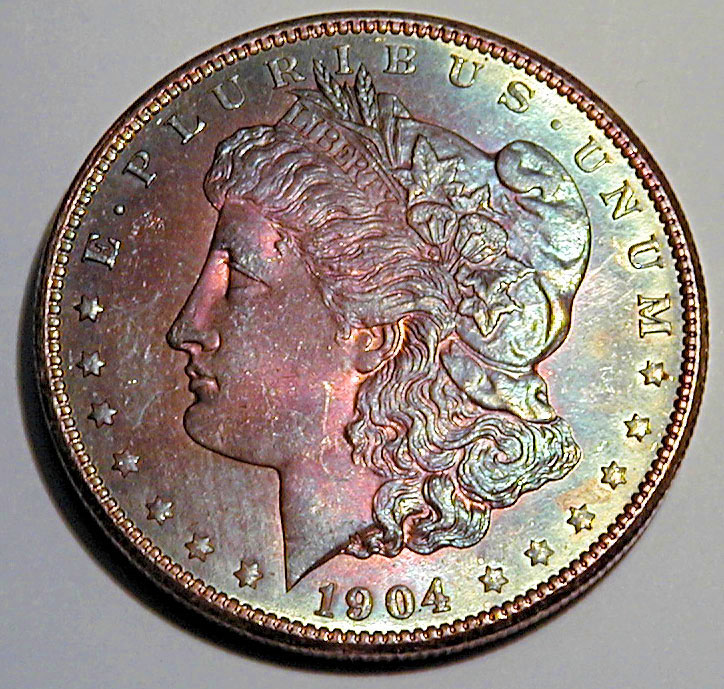
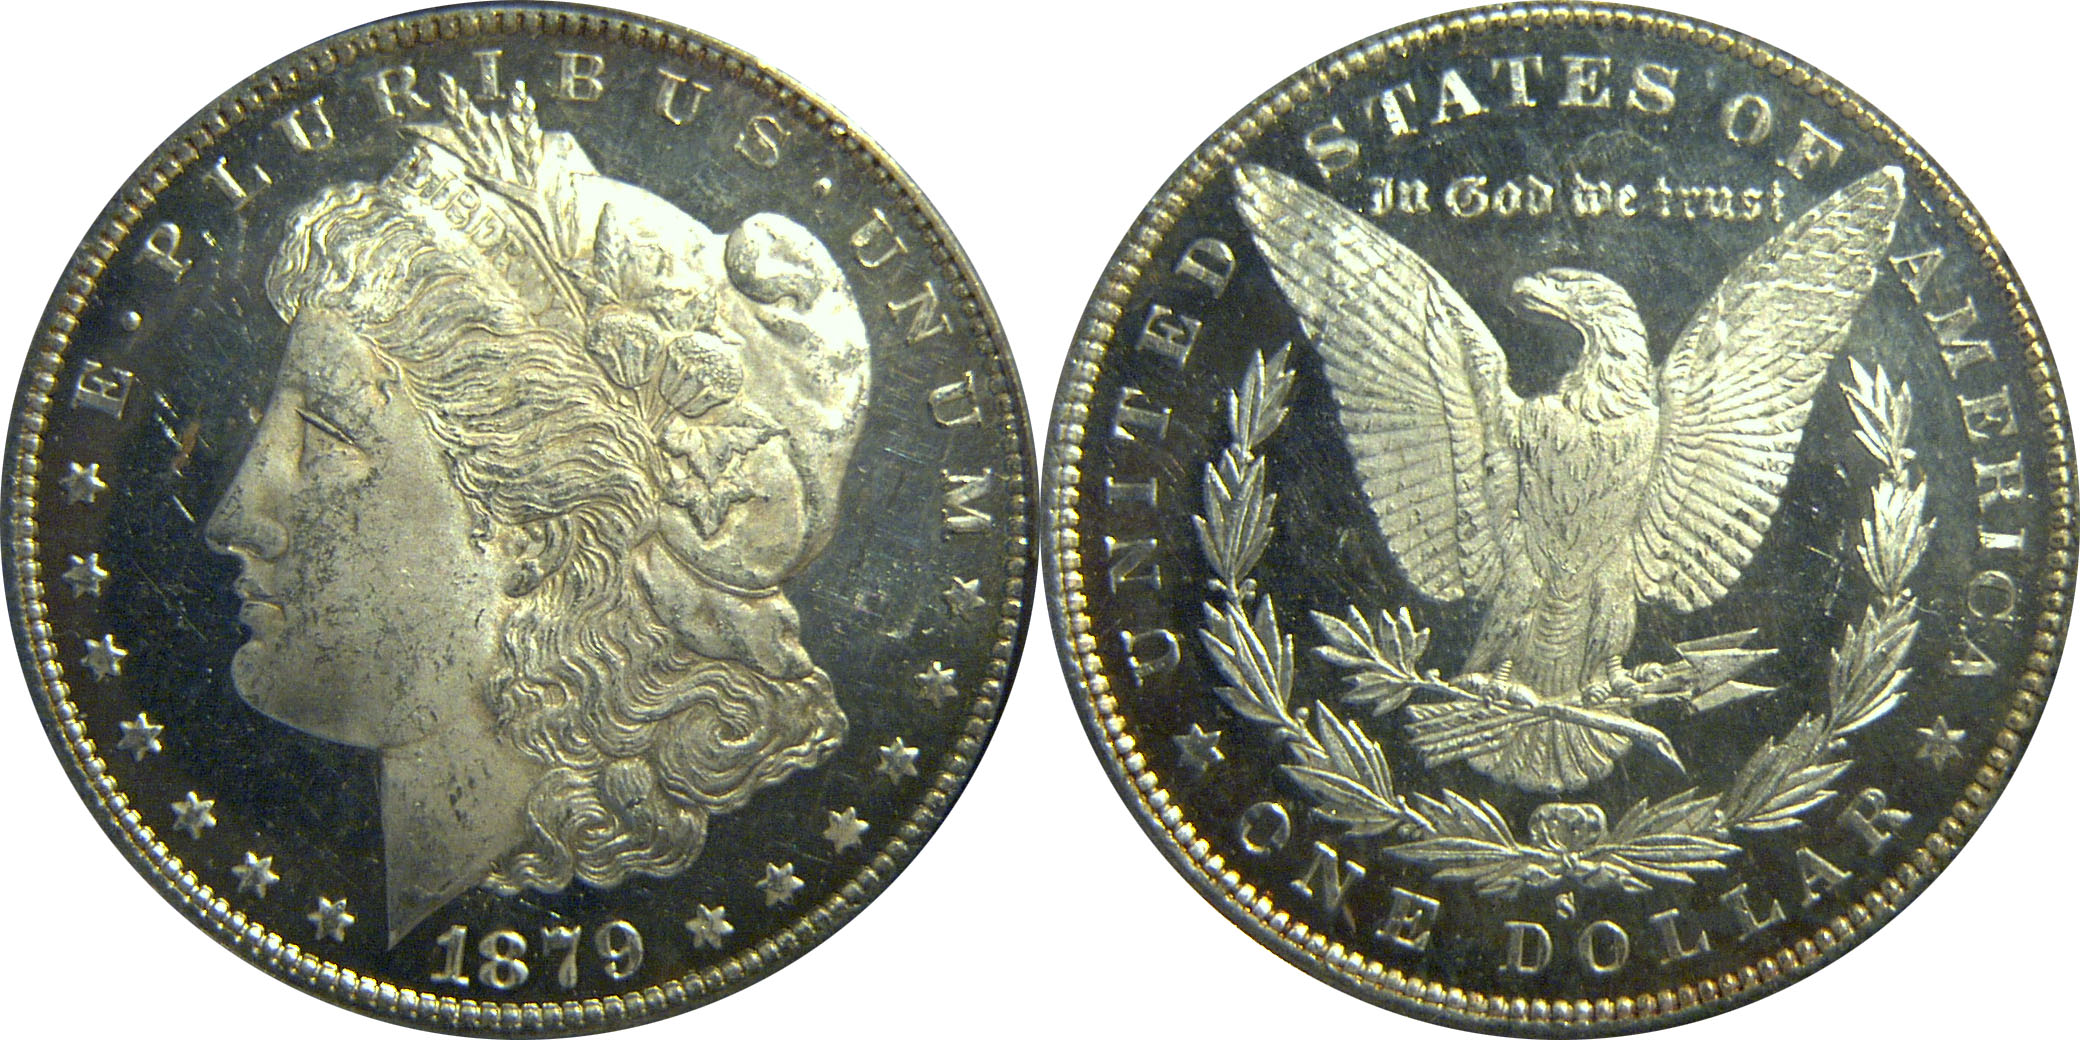
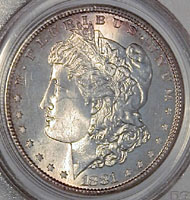
  

Luster

Related to reflectivity is luster. Mint state coins often show a cartwheel effect produced by microscopic flow lines on the coin's surface, such as seen on this 1881-S PCGS MS66 Morgan dollar. As before, the scanner sees the high detail of the coin, but also as before, the coin exhibits a matte surface. Highlights are seen in the hair, however, as the scanner light has reached it at an advantageous angle. In contrast, the camera sees a significant cartwheel on the coin's surface and the coin itself has a more even appearance with the hair no more highlighted than the rest of the coin.
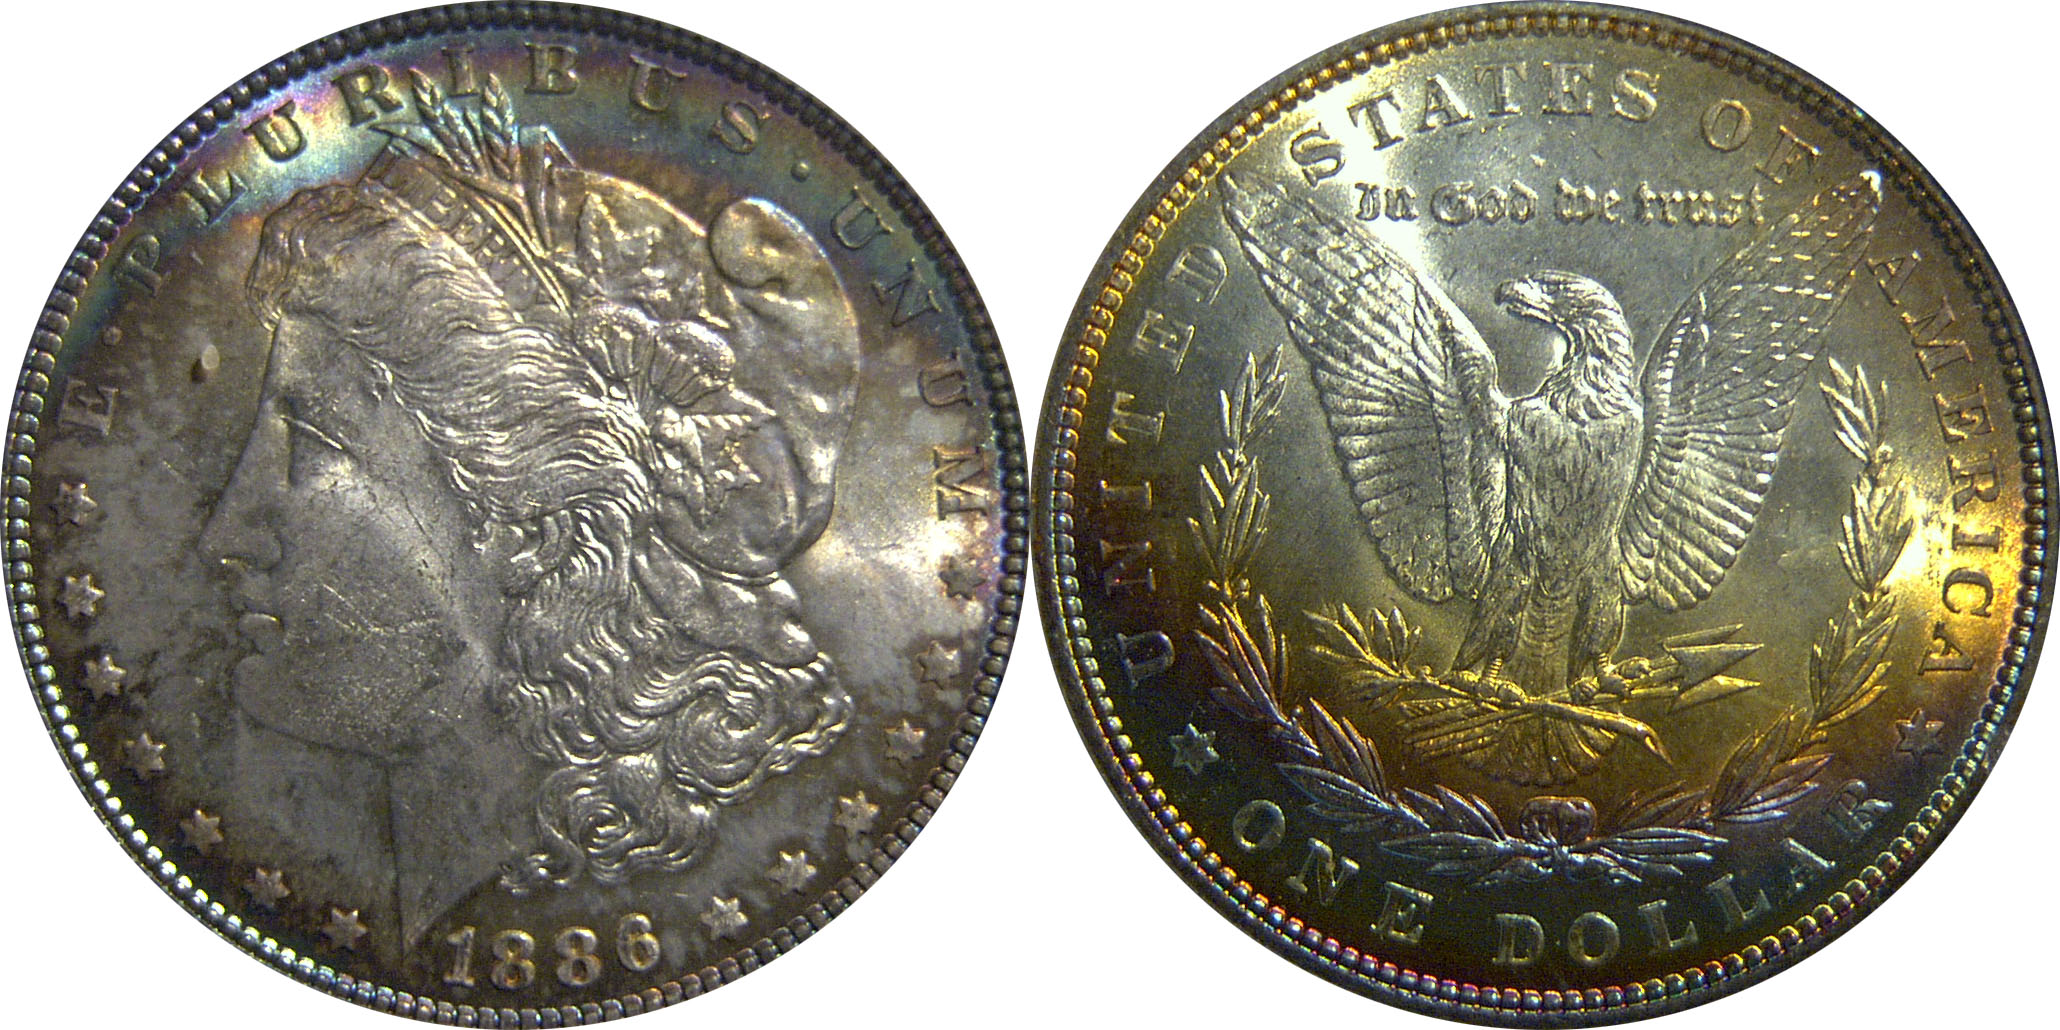
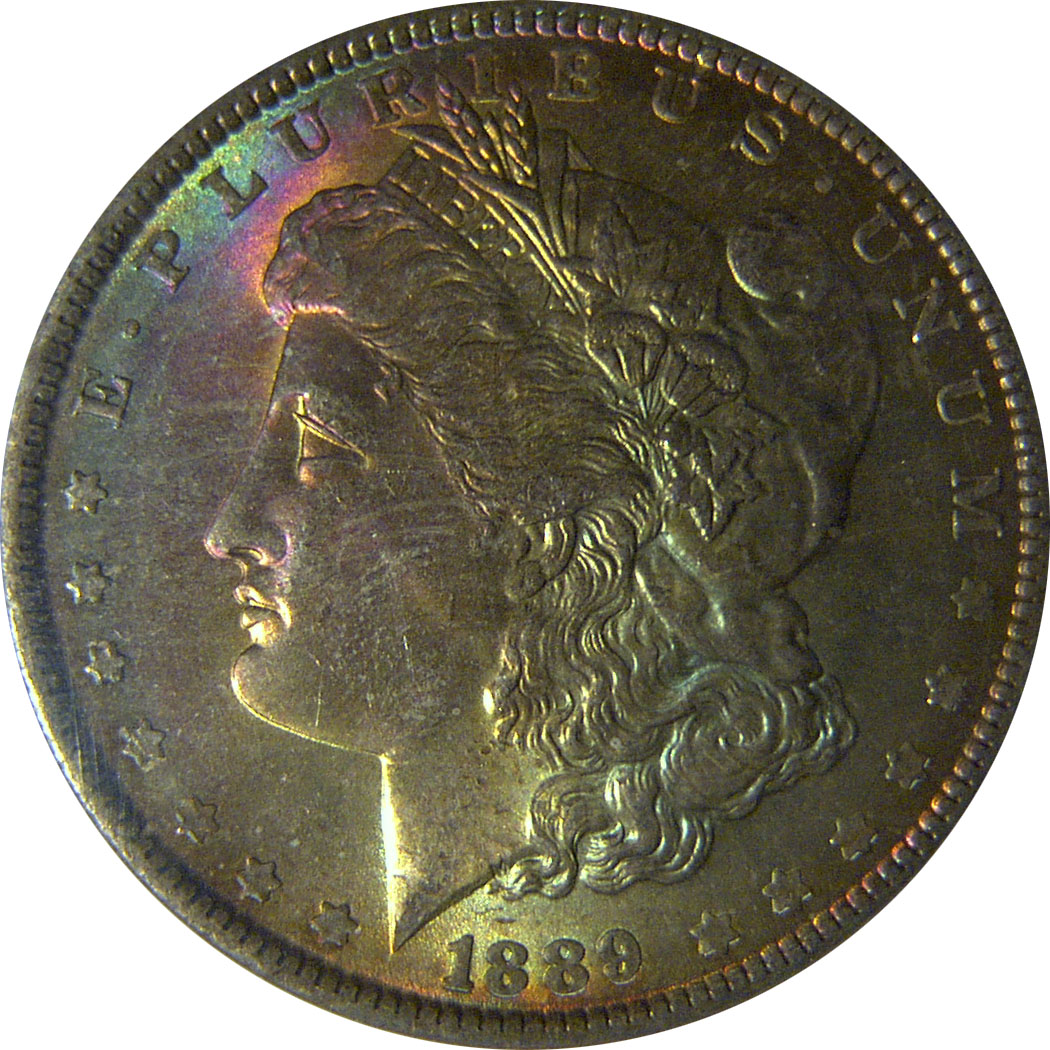
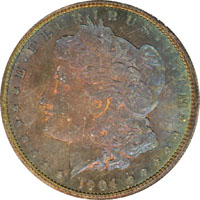


Toning

Scanners may also not see toning of a coin correctly. The 1881-S Morgan shows this slightly - the pink toning in PLURIBUS appears as almost a shadow in the scan - but this PCGS MS64 1904-O Morgan dollar shows it dramatically. The coin in hand appears as the camera sees it - an obverse of lustrous purple and green. The scanner sees a completely different matte orange and green. Although radically different, it is clear that it is the same coin - note the white irregular feature below and to the left of the ear along the cheek and neck - it is seen in both images.
 

Conclusion

Although in each case the camera produced an image of superior accuracy when compared to the coin itself, it does have its drawbacks. Without a professional setup, the coin had to have been imaged at an angle to show the surface clearly. This produces an image which is oval while a scanner produces an image which is correctly round. Also without a professional setup it is difficult for the camera to image a coin at an exact scale. A scanner does this by its nature - a coin scanned at 600dpi is exactly that size. My camera in particular also suffers from a third problem. This camera has an auto-focus which cannot be disabled, and when in macro mode - designed for imaging objects close-up - often the camera focuses on something other than the desired object. Images needed to be taken repeatedly until one that was clear was obtained. Coins encased in slabs were particularly difficult - the camera tended to focus on the surface of the slab rather than on the coin inside. Again, with a professional setup - including a professional camera which has a manual focus - a problem like this would be avoided.

Addendum

After the above was written, I have obtained a more suitable setup for imaging coins. A small camera stand coupled with a Toshiba PDR-M60 digital camera (which can focus to within 2" of a subject, unlike the Olympus above which can only focus to within 8") produces much better images without the distortion alluded to in the previous sections. Several examples of images taken with this setup are shown here:

Please direct comments to calkinsc@lotn.org